
Odoo
Integrate Hesabe Payment Gateway with your Odoo application. Comprehensive business management software with powerful payment processing capabilities.
Important : Before utilizing this module, ensure you have
- Installed the pycryptodome Python library for encryption purposes
- Odoo Payment and eCommerce modules installed and configured
- All accounting settings properly configured
- Important: Restart your Odoo server after major configuration changes
Compatibility
Accept KNET, Visa, Mastercard, and American Express through Hesabe wherever Odoo accepts payments from eCommerce checkout and portal invoices to invoices collected via SMS payment links
Odoo 19.0 · Supports Odoo.sh and On-Premise deployments. Not supported on Odoo Online, as it does not allow third-party modules. KWD-only transactions are supported.
Installation
Download Plugin
Get the Odoo 19 module from its GitHub repository:
| Payment Types | Payment Method | Invoices | Plugin Link |
|---|---|---|---|
| Odoo v19 | InDirect | Yes | Click here |
Install the SDK
The module talks to Hesabe through the hesabe-python SDK:
pip install --no-deps https://github.com/ruptyx/hesabe-python/archive/refs/tags/v1.3.0.tar.gz--no-deps is required
The SDK needs cryptography and requests, which Odoo already ships. Skipping --no-deps lets pip upgrade cryptography inside the Odoo environment.
On Odoo.sh, commit the module's requirements.txt to your project root instead — Odoo.sh installs it on build.
Add and Activate the Module
Copy the payment_hesabe folder into your addons path (not Odoo's core addons directory, which is overwritten on upgrade), then restart Odoo.
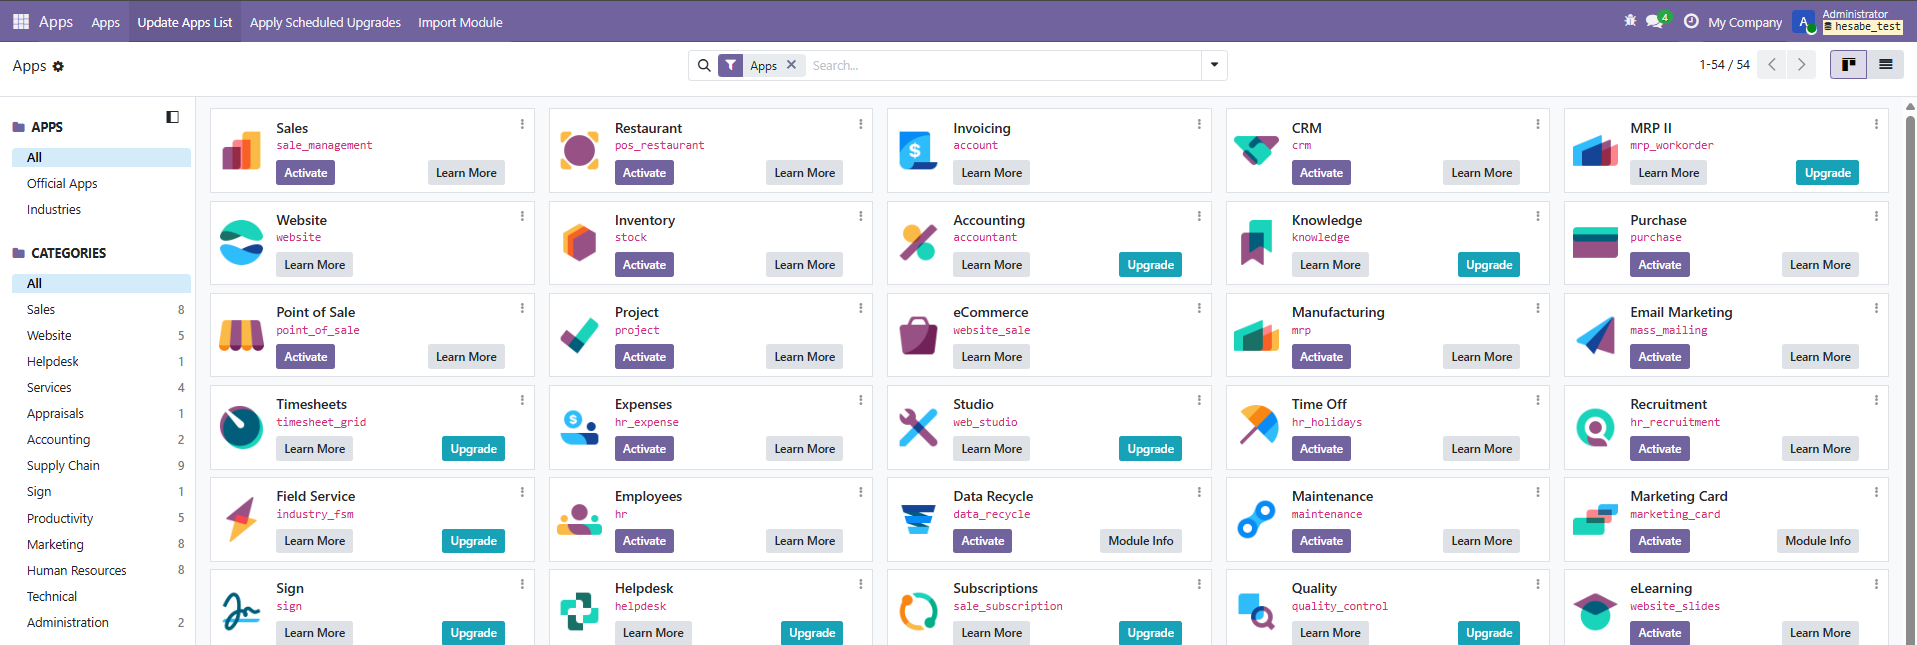
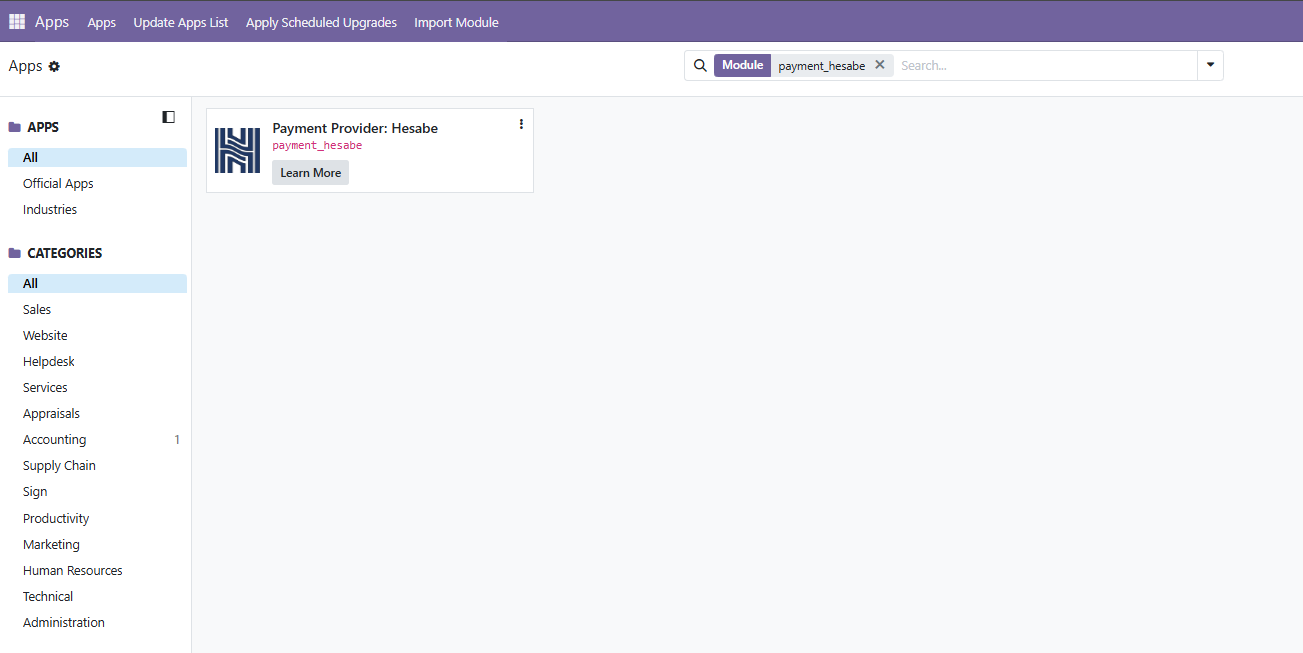
Enable developer mode, go to Apps → Update Apps List, search for payment_hesabe, and click Activate.
Configure Payment Provider Credentials
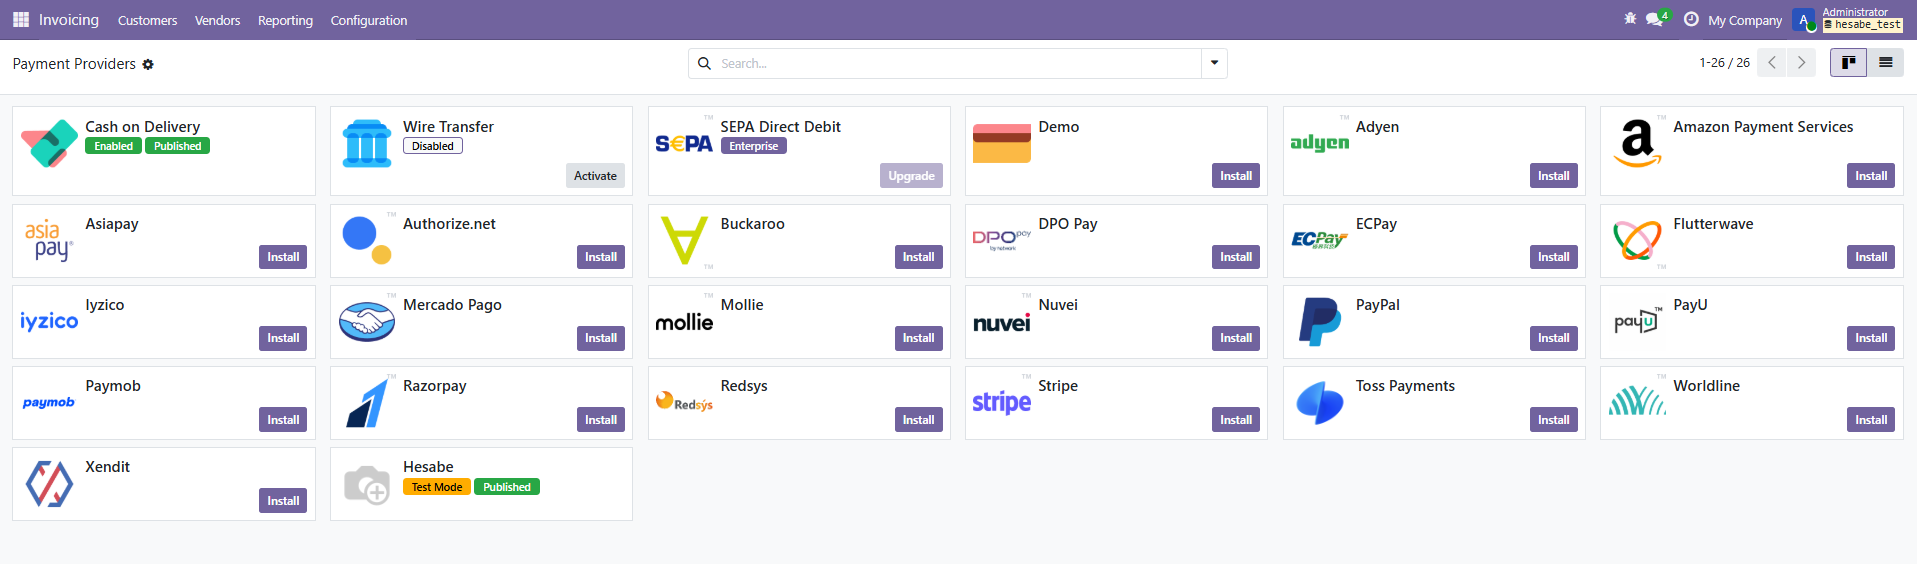
Go to Invoicing → Configuration → Payment Providers and open Hesabe.
Copy all credentials from merchant panel (Merchant ID, Access Code, Secret Key and IV Key) from Profile → Account section and configure them in your application.
Sandbox Access Keys
Below configuration for sandbox testing only. Never use these sandbox configurations in production environment.
| Sandbox Parameter | Sandbox Value |
|---|---|
| Merchant Code | 842217 |
| Access Code | c333729b-d060-4b74-a49d-7686a8353481 |
| Secret Key | PkW64zMe5NVdrlPVNnjo2Jy9nOb7v1Xg |
| IV Key | 5NVdrlPVNnjo2Jy9 |
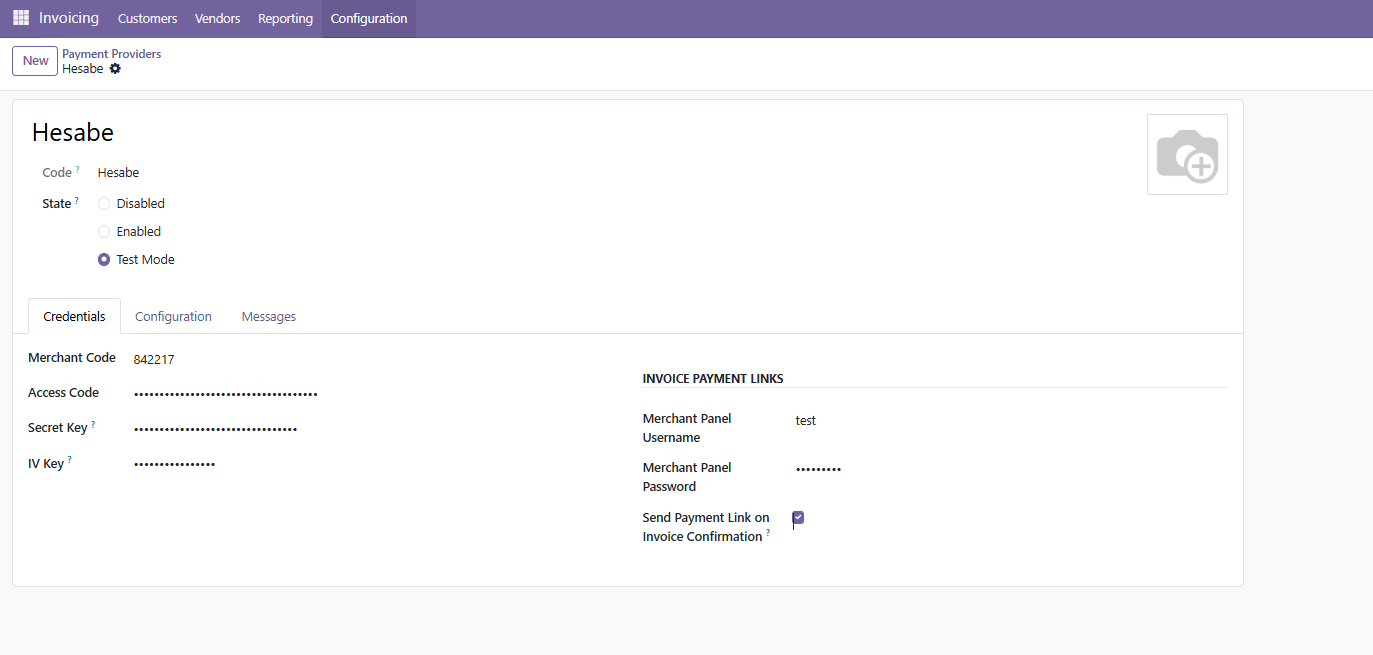
Set State to Test Mode for sandbox or Enabled for production, then tick Published
Published follows State
Choosing Enabled ticks Published automatically; choosing Test Mode unticks it. If Hesabe is missing at checkout during sandbox testing, check Published first.
Credential fields are visible only to system administrators — whoever onboards a merchant needs Settings access, not just Accounting.
Configure Payment Methods
KNET and Card activate automatically once the provider leaves Disabled — no separate step needed.
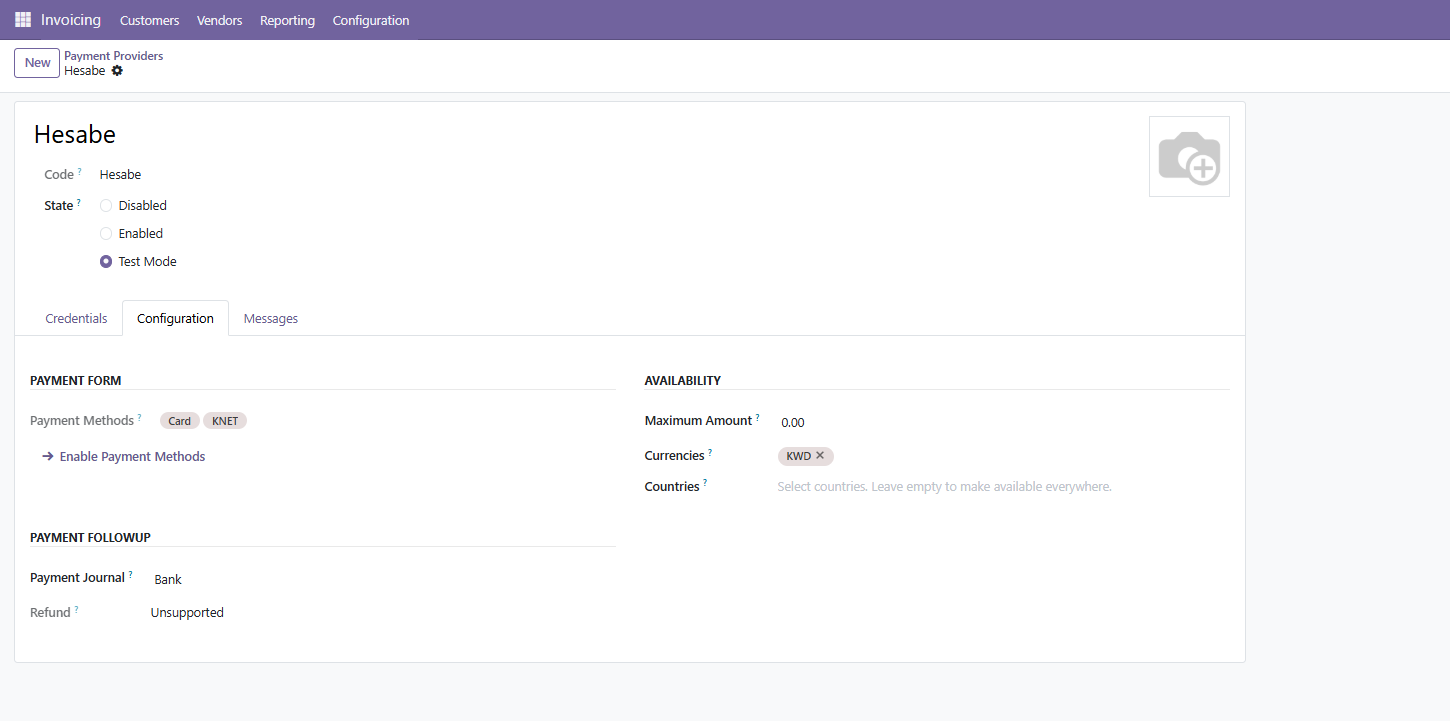
| Method | Behavior |
|---|---|
| KNET | Sends the customer straight to the bank's payment page |
| Card | Opens Hesabe's hosted page for Visa, Mastercard, Amex and wallets |
| Hesabe | Ships inactive; activate it (and deactivate KNET/Card) for a single option that always opens Hesabe's hosted picker — useful for rails Odoo has no method for, like Deema or Google Pay |
Optional: Enable SMS Payment Links
Invoice Payment Links
Fill in Merchant Panel Username and Merchant Panel Password (your Hesabe panel login, not more gateway keys) to let invoices collect payment by SMS link.
Leave this empty and the provider still works as a plain checkout gateway — the SMS option is simply absent from the invoice Send dialog.
Enable "Send Payment Link on Invoice Confirmation" to have Odoo text the link automatically the moment a qualifying invoice is confirmed.
Using Hesabe in Odoo
Paying an Invoice
Confirm a customer invoice in Invoicing → Customers → Invoices, then Send or Preview it.
The customer gets a Pay Now button — KNET goes straight to the bank's page, Card opens Hesabe's hosted page.
Once paid, the invoice is marked Paid and reconciled automatically.
Sending a Payment Link by SMS
With the merchant-panel login configured, the invoice Send dialog gains a pre-ticked "Hesabe payment link (SMS)" checkbox.
Hesabe sends the SMS itself, in the customer's language, and the customer pays on Hesabe's hosted page.
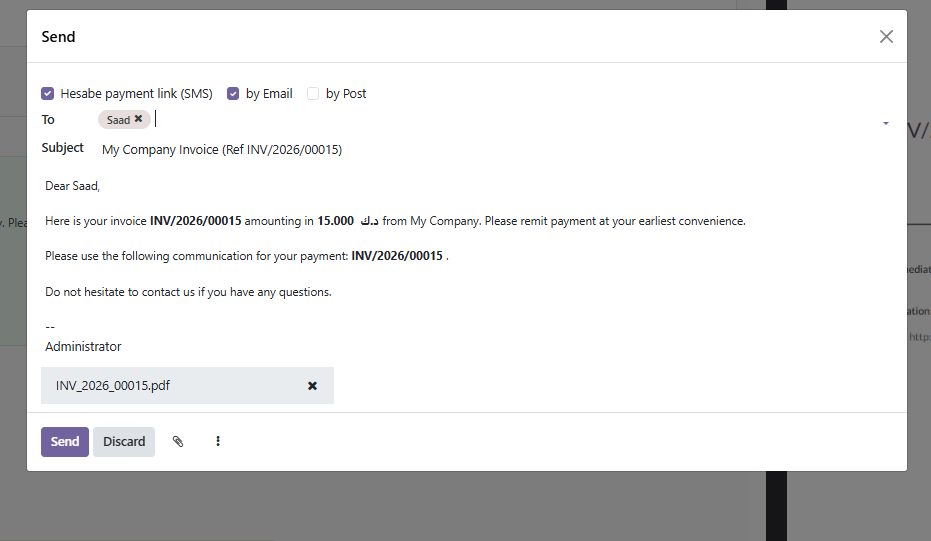
| Rule | Detail |
|---|---|
| Phone format | International form (+965) required — otherwise the send goes ahead by email only |
| Validity window | Payable until the invoice due date (one-week minimum) — only unpaid KWD invoices qualify |
| Re-sending | Updates the same link rather than creating a duplicate |
| Amount range | 0.300–15,001 KWD |
eCommerce Checkout
Hesabe appears at checkout for any KWD order. With Website → Configuration → Settings → Invoicing → Automatic Invoice enabled, a paid order raises, posts, and reconciles its invoice with no manual step.
Payment Confirmation
Every inbound notification is verified, not trusted: Odoo re-reads the transaction from Hesabe's API and checks the confirmed amount before recording payment.
A scheduled job re-checks anything unfinished every 15 minutes (widening to daily over four days for abandoned checkouts), so a dropped webhook never leaves a paid order looking unpaid.
Troubleshooting
| Symptom | Cause |
|---|---|
| Hesabe missing at checkout | Order isn't in KWD, or the provider isn't Published (Test Mode unticks it) |
| Credential fields not visible | User lacks Settings access — credentials are restricted to system administrators |
| Payments not reconciling | Bank journal has no inbound payment method line, or the scheduled job is inactive |
| No SMS checkbox on Send | Merchant Panel credentials aren't set, provider is disabled, invoice isn't KWD, or it's already paid |
| SMS never arrives | Customer's phone number doesn't parse into +965… form |
| Link paid but invoice still open | Confirmation arrives via webhook or the scheduled job — check web.base.url is reachable from the internet |
Need Help?


Zoho Books
The Hesabe Payment Gateway Connector enables Zoho Books, along with other Zoho Finance applications that support payment gateway integrations, to securely redirect customers to Hesabe’s hosted checkout for payment processing. Upon completion, customers are returned to Zoho with a signed transaction response, allowing the system to automatically update the invoice status as paid or record any payment failure accordingly.
Magento
Integrate Hesabe Payment Gateway with your Magento store. Powerful open-source e-commerce platform with rich API capabilities for seamless payment processing.